Save and manage Discover sessions
When an exploration is worth coming back to, save it as a Discover session. The session keeps your queries, filters, columns, and view, so you can reopen the same exploration later or put it on a dashboard.
Kibana stores every saved session in the library, the place that the Open session list in Discover and the dashboards that use your sessions read from.
The privileges you need depend on what you do on this page:
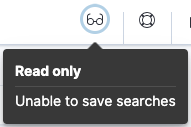
- Save a session, or save it as a new session: The All privilege for the Discover feature in Kibana. If you don't have it, Discover shows a Read only badge in the header and the Save button isn't visible.
- Add the session to a dashboard when you save it: The privileges to access and create dashboards, in addition to the All privilege for Discover. Without them, the Add to dashboard option isn't available.
- Open a saved session: Access to Discover.
- Rename or delete saved sessions: Edit or delete access to saved objects, which the Saved Objects feature grants. You reach this from the Open Discover session flyout, where you open sessions.
For more information, refer to Granting access to Kibana.
The following screenshot shows the Read only badge:
When you save, all open tabs are saved to the session.
- When you've created a view worth saving, select Save in the application menu.
- Enter a Title for the session.
- Optional: Enter a Description, and add Tags.
- Optional: If the session's data has a time field, turn on Store time with Discover session to save the current time filter and refresh interval with it.
-
Optional: When you save a new session, use Add to dashboard to also add the session as a panel on a dashboard. Select New to create a dashboard, Existing to select one, or None to skip. The session is saved to the library in all cases. - Select Save.
Result: The session is saved and appears in the Open Discover session flyout. To reload it later, refer to Open a saved Discover session.
A Discover session stores the following elements for each of its tabs:
- The query mode (ES|QL or classic)
- The query text and filters
- The data view
- If you turned on Store time with Discover session, the selected time filter and refresh interval
- The current view of Discover, including the document table layout, the chart, and any ES|QL variable controls
-
The JSON view of the document table, including how each tree is displayed. Refer to View documents as JSON. -
The Fast mode setting in ES|QL mode. Refer to Use Fast mode.
To work with the tabs of a session, refer to Run multiple explorations with tabs in Discover.
To go back to a session you saved, or to find one that a teammate saved, open it from Discover.
- In the application menu, select Open session. The Open Discover session flyout lists the saved sessions.
- To find a session, enter part of its title in the search box, or filter the list by tag. When the search box is empty, you can also sort the list by selecting the Title column header.
- Select the session.
Result: The session opens in Discover. If it uses a different data view than the one currently selected, Discover switches to it. The query mode that the session used is also selected automatically.
To rename, delete, or otherwise manage your saved sessions, select Manage Discover sessions in the flyout. The button opens the Saved Objects page, filtered to Discover sessions. It appears if your role lets you edit or delete saved objects.
This does not apply to Kibana spaces that use the Classic solution view.
To rename a session:
- In Discover, select the session title at the top of the page. The title becomes a text field.
- Enter the new title.
- Press Enter or select outside the field to confirm the new title. To keep the current title, press Esc instead.
- If the session isn't saved yet, the Save Discover session dialog opens with your title in the Title field. Select Save to save the session.
A session that you've already saved takes the new title right away, and changes in your open tabs that you haven't saved stay unsaved. If you close the dialog without saving a new session, the title goes back to New session.
To start a new session from an existing one, save a copy under a new title. The steps depend on your version.
- In Discover, open the Discover session that you want to duplicate.
- In the application menu, from the menu next to Save, select Save as. The Save Discover session dialog opens.
- Enter a Title for the new session, and optionally a Description and Tags.
-
Optional: In Add to dashboard, decide whether to also add the session as a panel on a dashboard. Select New to create a dashboard, Existing to select one, or None to skip. The session is saved to the library in all cases. - Select Save.
- In Discover, open the Discover session that you want to duplicate.
- In the application menu, select Save.
- Enter a new name for the session.
- Turn on Save as new Discover session.
- Select Save.
Result: A new Discover session is saved with the title you entered.
- Use Discover sessions in dashboards: Add the session, its chart, or its table to a dashboard.
- Export results and sessions from Discover: Take the results or the session definition elsewhere.